If you’re interested in creating immersive content, a 360 camera is a must-have tool. These cameras capture a full 360-degree view of your surroundings, allowing viewers to feel like they’re right in the middle of the action. Whether you’re creating content for virtual reality or simply want to experiment with a new storytelling medium, a 360 camera is an exciting piece of equipment to work with.

Understanding 360 cameras can seem daunting at first, but with the right equipment and a little bit of know-how, you can create stunning 360 videos that will transport your viewers to another world. In this article, we’ll cover everything you need to know about making your own 360 camera, from the essential equipment you’ll need to setting up your camera and shooting your first 360 video.
Key Takeaways:
- A 360 camera is an essential tool for creating immersive content.
- With the right equipment and knowledge, anyone can make their own 360 camera.
- Creating stunning 360 videos requires careful planning and attention to detail.
Understanding 360 Cameras
https://www.youtube.com/watch?v=qExPe-nKdfI&embed=true
If you’re interested in creating immersive and interactive content, then 360 cameras are a must-have. These cameras capture a 360-degree view of the surroundings, allowing you to create stunning panoramic images and videos.
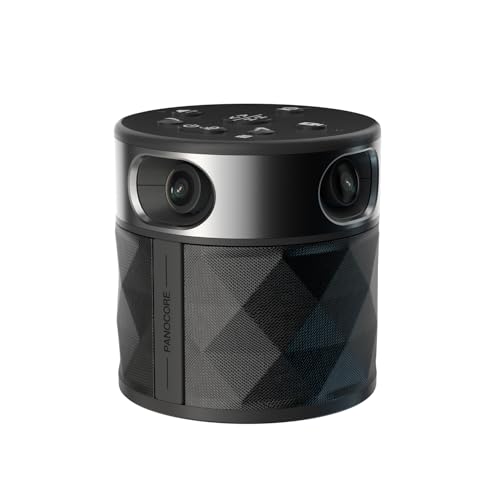
Types of 360 Cameras
There are two main types of 360 cameras: single-lens and multi-lens cameras. Single-lens cameras are small and portable, making them ideal for capturing on-the-go footage. Multi-lens cameras, on the other hand, use multiple lenses to capture a 360-degree view, resulting in higher quality images and videos.
How 360 Cameras Work
360 cameras work by using multiple lenses to capture a 360-degree view of the surroundings. These lenses capture images and videos from different angles, which are then stitched together using software to create a panoramic view.
To capture a 360-degree view, the camera needs to have at least two lenses. These lenses are placed on opposing sides of the camera body, capturing everything around the camera. The resulting images and videos can be viewed on a computer, smartphone, or with a virtual reality headset.


« Does Your Venue Have a 360 Camera? Find Out How to Enhance Your Event Experience
Best 360 Camera for Travel: Capture Your Adventures in 360 Degrees »
When choosing a 360 camera, it’s important to consider factors such as image and video quality, durability, and ease of use. Some popular 360 cameras on the market today include the Insta360 One X2 and the GoPro Max.
In conclusion, 360 cameras are a powerful tool for creating immersive and interactive content. Whether you’re a professional photographer or just starting out, a 360 camera can take your content to the next level.
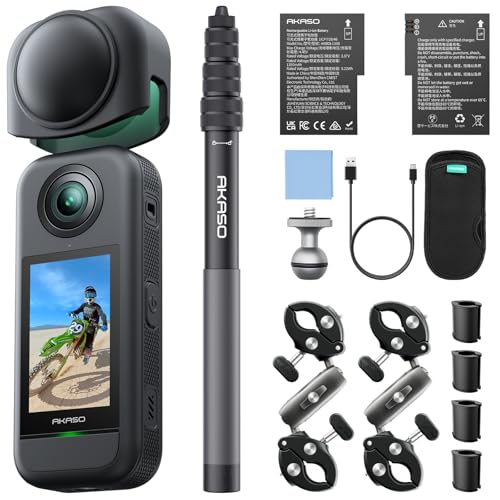
Essential 360 Camera Equipment
https://www.youtube.com/watch?v=ffAZAlG0MN8&embed=true
If you want to make high-quality 360 videos, you need to invest in the right equipment. In this section, we’ll cover the essential gear you need to get started.
Choosing the Right Tripod or Monopod
Having a stable base for your 360 camera is crucial. A tripod or monopod will help you keep your camera steady and level, which is essential for capturing smooth, immersive footage.


When choosing a tripod or monopod, consider the weight and size of your camera. You want to make sure that your equipment is compatible with your camera and can support its weight. Additionally, you may want to choose a tripod or monopod with adjustable legs or a center column, which can help you get the perfect height and angle for your shots.
Selecting Additional Accessories
In addition to a tripod or monopod, there are a few other accessories that can help you get the most out of your 360 camera.
A selfie stick can be a great tool for capturing unique perspectives and angles. Look for a selfie stick that is compatible with your camera and has a secure mount to keep your camera in place.
A gimbal can also be a useful accessory for shooting smooth, stabilized footage. A gimbal is a motorized device that helps keep your camera level and steady, even when you’re moving.
Finally, consider investing in additional batteries and memory cards. Shooting 360 video can be battery-intensive, and you don’t want to run out of power in the middle of a shoot. Similarly, you’ll want to have plenty of storage space for your footage, so make sure you have enough memory cards to last you through a shoot.
By investing in the right equipment and accessories, you can capture stunning 360 video that will immerse your viewers in your content.
Setting Up Your 360 Camera
https://www.youtube.com/watch?v=T_RKIitR2BI&embed=true
Congratulations on your decision to make your own 360 camera! In this section, we will cover the basics of setting up your camera for optimal performance.
Mounting Techniques
Before you start setting up your camera, you need to ensure that it is mounted securely. A shaky camera will result in blurry images and videos. The most common mounting technique is to use a tripod. Make sure that your tripod is stable and that the legs are extended to at least five feet (1.5 meters) high. This will ensure that your camera is at the right height to capture your surroundings.
Camera Settings for Optimal Capture
Once your camera is mounted, you need to adjust the camera settings for optimal capture. The most important setting is the resolution. A higher resolution will give you sharper images and videos. However, a higher resolution will also take up more storage space on your camera and computer. Therefore, you need to balance the resolution with your storage capacity.
Another important setting is the lighting. Make sure that your camera is set up in a well-lit environment. A poorly lit environment will result in dark and grainy images and videos. If you are shooting outdoors, make sure that you shoot on bright sunny days. This will ensure that your images and videos look vibrant and colorful.
Lastly, make sure that your camera is stabilized. A stabilized camera will result in smoother images and videos. You can use a gimbal or a stabilizer to achieve this. A gimbal is a device that holds your camera steady while you move around. A stabilizer is a device that attaches to your camera and reduces camera shake.
In conclusion, setting up your 360 camera is not difficult. Just make sure that your camera is mounted securely, adjust your camera settings for optimal capture, and stabilize your camera. With these tips, you will be able to capture stunning 360-degree images and videos.
Shooting 360 Videos
https://www.youtube.com/watch?v=je7zfhi3DeI&embed=true
When it comes to shooting 360 videos, there are a few things you need to keep in mind. In this section, we’ll cover the basics of planning your shoot and some filming techniques to help you capture the best footage possible.
Planning Your Shoot
Before you start filming, it’s important to plan your shoot carefully. This means thinking about the story you want to tell and the message you want to convey. Consider the following:
360 Video: Remember that 360 video is all about immersing the viewer in the scene. Think about what you want your audience to see and experience. Take them on a journey and make them feel like they’re really there.
Movement: Movement is key in 360 video. You want to keep the camera moving to give the viewer a sense of space and depth. Consider using a tripod or a stabilizer to keep the camera steady while you move.
Pace: The pace of your video is important. You want to keep the viewer engaged without overwhelming them. Consider using a mix of slow and fast shots to create a sense of rhythm.
Storytelling: Finally, remember that 360 video is all about storytelling. Think about the narrative you want to create and use the camera to help tell that story.
Filming Techniques
Now that you’ve planned your shoot, it’s time to start filming. Here are a few techniques to keep in mind:
360-degree view: Remember that the camera captures a 360-degree view of the scene. This means you need to be aware of what’s behind the camera as well as in front of it. Consider using a mirror or a monitor to help you see what’s behind you.
Lighting: Lighting is important in any video, but it’s especially important in 360 video. Make sure you have enough light to illuminate the entire scene, and avoid placing the camera in areas with extreme lighting conditions.
Stitching: Finally, remember that 360 video requires stitching together multiple shots to create a seamless video. Make sure you have the right software to do this, and take the time to carefully align and blend your shots.
By following these tips, you’ll be well on your way to creating stunning 360 videos that will captivate your audience.
360 Video Formats and Resolution
Understanding Video Formats
Before you start creating a 360 video, it’s important to understand the different video formats available. The most common video formats for 360 videos are MOV and MP4. MOV is a video format developed by Apple, while MP4 is a more widely used format that is compatible with most devices. Both formats support the H.264 video codec, which is the most widely used codec for video compression.
When it comes to 360 video formats, equirectangular is the most common format used for 360 videos. Equirectangular videos have a 2:1 aspect ratio and are wrapped around a sphere to create a 360-degree view. This format is supported by most video players and platforms, including YouTube and Facebook.
Choosing the Right Resolution
Choosing the right resolution for your 360 video is important to ensure that your video looks great on all devices. The most common resolutions for 360 videos are 3840×1920, 4096×2048, 5760×2880, and 7680×3840. The higher the resolution, the more detail your video will have, but it will also require more processing power and storage space.
When choosing a resolution for your 360 video, it’s important to consider the capabilities of your camera and the device that your video will be viewed on. Higher resolutions require more processing power and may not be supported by older devices. It’s also important to consider the file size of your video, as larger files may take longer to upload and may not be supported by all platforms.
Overall, it’s important to choose a resolution that balances quality and compatibility with your camera and device.
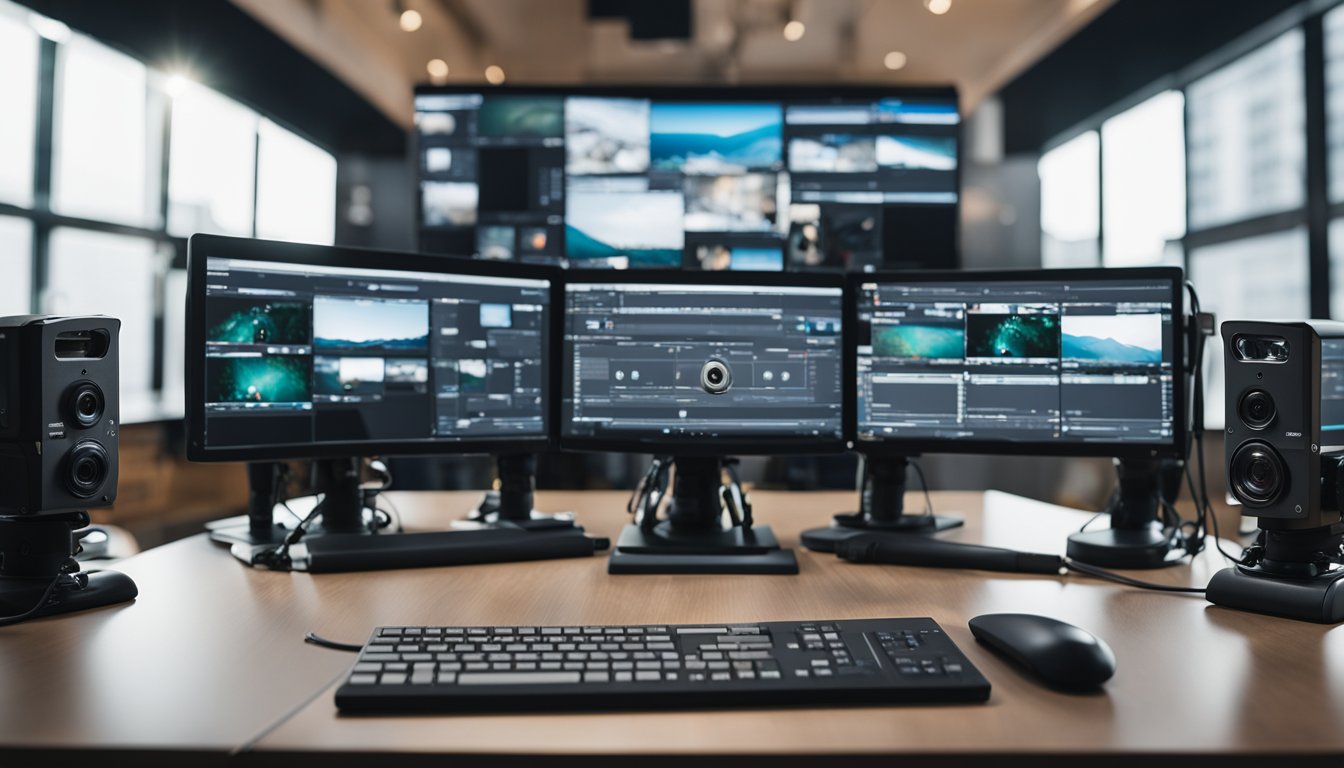
Editing 360 Videos
https://www.youtube.com/watch?v=wma7ILj3sxw&embed=true
Editing 360 videos can be a bit tricky, but with the right software and techniques, you can create stunning immersive videos that will leave your viewers amazed. In this section, we’ll cover the software you need and some editing techniques to help you get started.
Software for 360 Video Editing
When it comes to editing 360 videos, there are a few software options available. Adobe Premiere Pro is a popular choice among professionals, but it can be a bit complicated for beginners. If you’re just starting out, you might want to try Kolor Autopano Video or VideoStitch Studio, which are both user-friendly and offer a range of features for editing 360 videos.
Editing Techniques
Once you have your software set up, it’s time to start editing your 360 videos. Here are a few editing techniques to help you get started:
Stabilization: Because 360 cameras capture a wide field of view, camera shake can be more noticeable in 360 videos. Use the stabilization feature in your software to smooth out any shaky footage.
Color Correction: Adjusting the color of your video can help make it look more vibrant and professional. Use color correction tools to adjust the brightness, contrast, and saturation of your footage.
Reframing: With 360 videos, you can change the perspective of your footage by reframing it. This means you can move the viewer’s focus to different parts of the video. Experiment with different angles to create a more dynamic and engaging video.
Adding Text and Graphics: Adding text and graphics to your 360 videos can help provide context and information to your viewers. Use your software’s text and graphics tools to add titles, captions, and other visual elements to your video.
With these editing techniques and software options, you’ll be able to create stunning 360 videos that will amaze your viewers.
Enhancing Audio and Stabilization
https://www.youtube.com/watch?v=veys_B1fFe4&embed=true
Capturing quality sound is just as important as capturing high-quality visuals when it comes to 360-degree videos. To ensure that your audio is of the best quality, you should invest in a microphone that is compatible with your 360 camera. You can use an external microphone that plugs into your camera or use a 360 camera that has built-in ambisonic audio. Ambisonic audio is a surround sound format that captures sound from all directions. It is perfect for immersive 360-degree videos.
Stabilizing your footage is also crucial in creating high-quality 360 videos. Most 360 cameras come with built-in stabilization technology, such as FlowState stabilization. This technology helps reduce camera shake and ensures that your footage is smooth and stable. However, if you want to take your stabilization to the next level, you can use a gimbal. A gimbal is a device that helps stabilize your camera and reduces camera shake even further. It is especially useful for capturing moving shots.
Here are some tips to help you capture quality sound and stabilize your footage:
Capturing Quality Sound
- Use an external microphone that is compatible with your 360 camera for better audio quality.
- Use a 360 camera with built-in ambisonic audio for immersive surround sound.
- Make sure to capture audio from all directions to create a more immersive experience.
Stabilizing Your Footage
- Use a 360 camera with built-in stabilization technology, such as FlowState stabilization.
- Use a gimbal to further stabilize your camera and reduce camera shake, especially for moving shots.
- Keep a safe distance of 1m (about 3 feet) from the camera when possible to reduce distortion and ensure accurate stitching of your footage.
By following these tips, you can enhance the audio and stabilization of your 360-degree videos and create a more immersive experience for your viewers.
Exporting and Sharing Your 360 Video
https://www.youtube.com/watch?v=v3iwpIEY26Y&embed=true
Exporting and sharing your 360 video is the final step in the process of creating your 360-degree video. In this section, we will discuss the two main aspects of exporting and sharing your 360 video: metadata and export settings, and platforms for sharing.
Metadata and Export Settings
Metadata is information about your video that is embedded in the video file itself. This information can include the title of your video, the author, and other relevant information. It is important to add metadata to your 360 video to ensure that it is properly recognized as a 360-degree video by platforms like YouTube and Facebook.
When exporting your 360 video, it is important to choose the correct export settings. You should export your video in a format that is compatible with the platform you plan to share it on. For example, YouTube supports several 360-degree video formats, including equirectangular, fisheye, and dual fisheye. Make sure to choose the correct format when exporting your video.
Platforms for Sharing
Once you have exported your 360 video, it is time to share it with the world. There are several platforms that support 360-degree videos, including YouTube and Facebook. When sharing your video on these platforms, make sure to follow their specific guidelines for uploading 360-degree videos.
YouTube is one of the most popular platforms for sharing 360-degree videos. To upload your video to YouTube, simply log in to your account and click the “Upload” button. From there, you can select your 360 video file and add any necessary metadata. Once your video is uploaded, it will be available for viewing in 360 degrees.
Facebook is another popular platform for sharing 360-degree videos. To upload your video to Facebook, simply navigate to your profile or page and click the “Create Post” button. From there, you can select your 360 video file and add any necessary metadata. Once your video is uploaded, it will be available for viewing in 360 degrees.
In conclusion, exporting and sharing your 360 video is an important step in the process of creating a 360-degree video. By following the guidelines for metadata and export settings, and choosing the right platforms for sharing, you can ensure that your 360 video is properly recognized and viewed by your audience.
360 Video and Virtual Reality
https://www.youtube.com/watch?v=TOd_VYOKMm0&embed=true
If you’re looking to create immersive experiences using 360 videos, it’s important to understand how they integrate with virtual reality (VR) headsets. By creating 360 videos, you can provide a more immersive experience than traditional video content.
Integrating with VR Headsets
To create a truly immersive experience, you need to integrate your 360 videos with VR headsets. VR headsets are designed to be worn on your head, and they typically have two lenses that project images onto your eyes. This creates a 3D effect that makes it feel like you’re actually in the video.
There are a few different types of VR headsets available, including the Oculus Rift, HTC Vive, and Samsung Gear VR. Each of these headsets has its own strengths and weaknesses, so it’s important to do your research and choose the one that’s right for your needs.
Creating Virtual Tours
Another way to use 360 videos is by creating virtual tours. Virtual tours allow people to explore a location without actually being there. This can be useful for real estate agents, travel companies, and other businesses that want to showcase their products or services.
To create a virtual tour, you’ll need to film a series of 360 videos that show different parts of the location. You can then stitch these videos together to create a seamless experience. You can also add interactive elements like hotspots that allow users to click on different parts of the video to learn more about the location.
Overall, 360 videos and virtual reality can provide a more immersive experience for your audience. By integrating your 360 videos with VR headsets and creating virtual tours, you can create a truly immersive experience that will leave a lasting impression on your viewers.
Advanced Techniques and Considerations
https://www.youtube.com/watch?v=zxSY4EP2Hv0&embed=true
Color Grading and Effects
Color grading and effects can greatly enhance the look and feel of your 360 videos. Color grading is the process of adjusting the color and tone of your footage to create a specific look or mood. This can be done using specialized software such as Adobe Premiere Pro or DaVinci Resolve. You can also use presets or LUTs (lookup tables) to quickly apply a specific color grade to your footage.
Effects such as lens flares, light leaks, and transitions can also add visual interest to your 360 videos. However, it’s important to use these effects sparingly and tastefully, as they can quickly become distracting and take away from the immersive experience of 360 video.
Dynamic Range and Exposure
One of the challenges of shooting 360 video is dealing with the wide dynamic range of lighting conditions. It’s important to properly expose your footage to avoid blown-out highlights or underexposed shadows. You can use a histogram to help you gauge the exposure of your footage.
If you’re shooting in difficult lighting conditions, you may want to consider using HDR (High Dynamic Range) techniques. HDR involves taking multiple exposures of the same scene and combining them to create an image with a wider dynamic range. This can be done using specialized software or by manually blending the exposures in Photoshop.
Another consideration when shooting 360 video is the stitch line, which is the area where the two halves of the equirectangular image meet. It’s important to avoid placing important elements such as faces or text near the stitch line, as they can become distorted and difficult to read. You can use masking or other techniques to hide the stitch line or minimize its impact on your footage.
Overall, color grading, effects, dynamic range, and exposure are important considerations when creating high-quality 360 video. By using these techniques and paying attention to the details, you can create immersive and engaging 360 videos that captivate your audience.
DIY 360 Camera Projects
https://www.youtube.com/watch?v=vaogtrRmAuI&embed=true
If you are interested in creating your own 360 camera, there are a few DIY projects that you can try out. In this section, we will cover two such projects that you can easily do at home.
Building a 360 Camera with Raspberry Pi
One of the most popular DIY 360 camera projects involves using a Raspberry Pi. The Raspberry Pi is a small, affordable computer that can be used for a variety of projects, including building a 360 camera.
To build a 360 camera with Raspberry Pi, you will need a few things:
- Raspberry Pi
- Camera module
- Wide-angle lens
- 3D printed case
There are many tutorials available online that can guide you through the process of building a 360 camera with Raspberry Pi. One such tutorial can be found on Digital Trends. The tutorial explains how to build a 360 camera using a Raspberry Pi Zero and a wide-angle lens. The total cost of the project is around $50.
Creative Projects and Ideas
Once you have built your own 360 camera, you can use it to capture stunning 360-degree photos and videos. Here are a few creative project ideas to get you started:
- Virtual tours: Use your 360 camera to create virtual tours of your home, office, or any other space.
- Action camera: Attach your 360 camera to a helmet or other gear to capture 360-degree footage of your adventures.
- Time-lapse videos: Use your 360 camera to create time-lapse videos of sunsets, cityscapes, or other scenes.
The possibilities are endless when it comes to creating with a 360 camera. With a little creativity and some DIY skills, you can build your own 360 camera and start capturing immersive photos and videos today.
Frequently Asked Questions
https://www.youtube.com/watch?v=5xds4olIjw0&embed=true
What are the essential components needed to build a DIY 360 camera?
To build your own 360 camera, you will need a camera module, a fisheye lens, a microcontroller, and a power source. You can use a Raspberry Pi as the microcontroller and power source. The camera module and fisheye lens can be purchased online or salvaged from old smartphones.
Can you create a 360-degree video booth at home, and how?
Yes, you can create a 360-degree video booth at home with a few simple steps. First, you will need a camera module and a fisheye lens. Mount the camera module on a tripod and attach the fisheye lens to it. Then, set up a backdrop and lighting to create the desired effect. Finally, use software to stitch together the images and create the 360-degree video.
What are some budget-friendly tips for making a 360 rotating camera stand?
To make a budget-friendly 360 rotating camera stand, you can use a lazy susan bearing, a stepper motor, and a microcontroller. You can salvage these components from old electronics or purchase them online. You can also use 3D printing to create the stand’s structure.
How do you stitch together images to create a 360-degree photo?
To stitch together images to create a 360-degree photo, you will need software that can merge the images seamlessly. There are many software options available, including PTGui, Hugin, and Autopano. These software packages use advanced algorithms to align and blend the images, creating a seamless 360-degree photo.
What steps are involved in setting up a Raspberry Pi for a 360 camera project?
To set up a Raspberry Pi for a 360 camera project, you will need to install the operating system, connect the camera module and fisheye lens, and install the necessary software. You can use the Raspbian operating system and the Raspberry Pi camera module. You will also need to install software such as OpenCV and FFMPEG to process the images and videos.
What are common pitfalls to avoid when creating a DIY 360 camera slider?
When creating a DIY 360 camera slider, it is important to avoid common pitfalls such as using low-quality components, not testing the slider before use, and not properly securing the camera to the slider. To ensure the slider is stable and secure, use high-quality components and test the slider before use. Additionally, make sure to properly secure the camera to the slider to avoid any accidents.