360 cameras have opened up a new world of photography and videography by allowing content creators to capture fully immersive experiences. With dual 180-degree lenses, these cameras record everything around them, stitching the footage together to create a spherical view. The beauty of a 360-degree camera lies in its ability to provide a complete perspective, inviting viewers to explore the scene as if they are physically present.
Using a 360-degree camera is not only about the capture but also about the innovative ways to share and view content. From virtual reality experiences to interactive online videos, the content you create can be enjoyed in a variety of ways. With a simple press of the shutter button, it automatically shoots in all directions, but mastering the gadget involves more than just point-and-click. Optimal camera settings, creative shot composition, and post-production techniques all contribute to the final result, ensuring your story is told exactly as you envision it.
Key Takeaways
- Capture everything around you with a 360 camera for an immersive experience.
- Utilize camera settings and shot composition for compelling 360 content.
- Engage with your audience by sharing interactive 360 videos and photos.
Understanding 360 Cameras
https://www.youtube.com/watch?v=WtAiEeZiYfs&embed=true
360 cameras empower you to capture every angle of the scene around you in a single shot, which is ideal for virtual reality experiences and interactive content. Let’s dive into the mechanics and variations of these innovative devices.
Basics of a 360 Camera
360 cameras utilize two fisheye lenses that have a roughly 180-degree field of view to record the full environment around the camera. When you use a 360 camera, it seamlessly stitches the images from these lenses together, producing a spherical view of the surroundings. The resolution of a 360 camera is significant as it determines the image quality; the higher the resolution, the sharper and more detailed your images will be.
Types of 360 Cameras
There are generally two types of 360 cameras:
- Consumer 360 Cameras: These are designed for everyday users, focusing on ease of use, portability, and affordability. They offer a range of resolutions suitable for sharing on social media or creating personal virtual reality content.
- Professional 360 Cameras: Professional-grade cameras provide higher resolution and image quality, which are vital for professional virtual reality content creation and immersive filmmaking. They come with more advanced features and greater control over the final output.
Remember, the right type of 360 camera for you depends on what you’re looking to capture and create. Whether it’s for personal memories or professional-quality virtual tours, there’s a 360 camera that fits your needs.
Preparation for Shooting
Before you start rolling with your 360 camera, a little forethought goes a long way. You’ll want to pick a spot that does your content justice, set up your camera correctly, and ensure everything is stable to avoid shaky footage.
Choosing the Right Environment
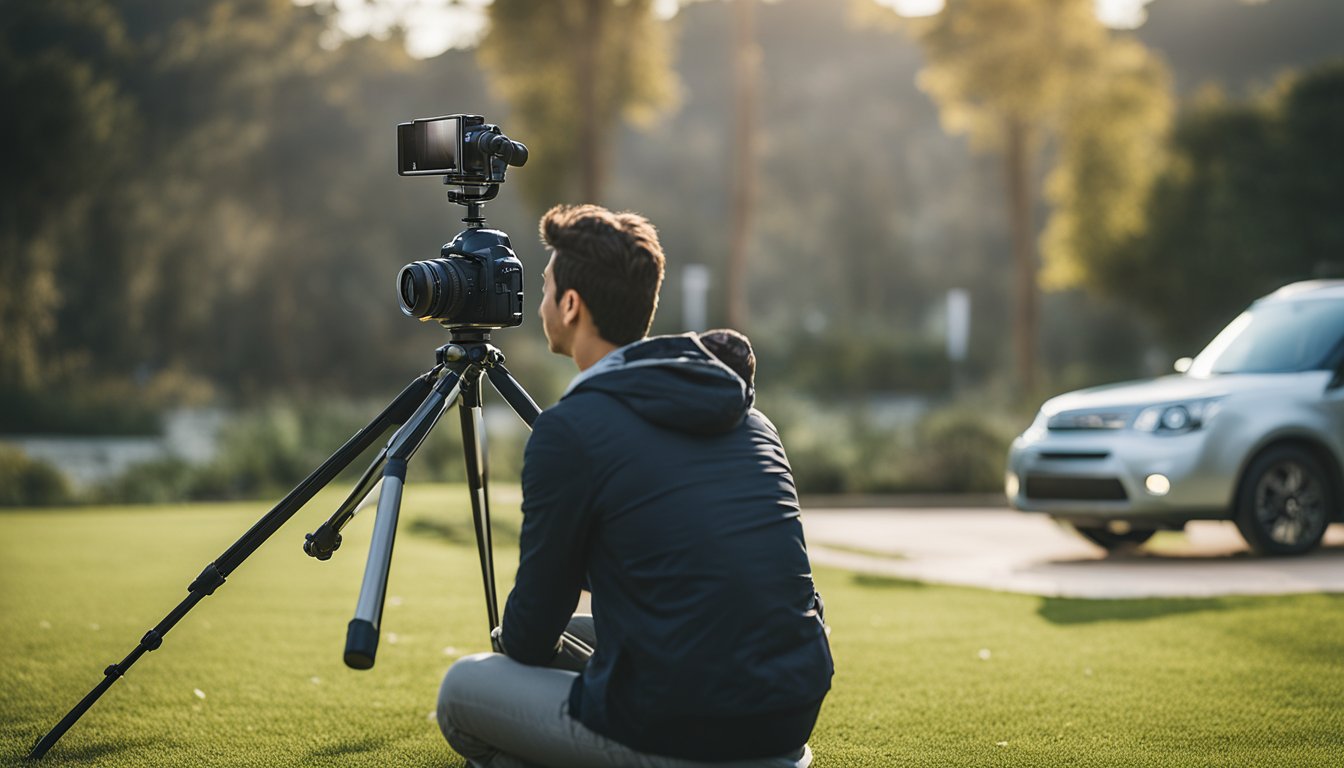
Selecting the ideal location is crucial for immersive 360-degree videos. Look for a scene that offers depth and variety, as these elements contribute to a more engaging experience. Keep in mind the advice from Gear Patrol. They suggest keeping the action six to ten feet away from your camera to maintain good focus. Additionally, consider the natural stitch lines of your camera and place key subjects away from these potential distortions.
Camera Setup and Stability
Camera Setup is pivotal for achieving high-quality 360 footage. The best 360 camera for you will be the one that suits the content you’re intending to capture. Ensure that your camera setup includes a fast and reliable microSD card for uninterrupted recording. Reference Toronto Metropolitan University’s guide to make sure you’ve got extra batteries or a power bank for extended shoots.
« 360fly Camera Review: Capturing Life in Every Angle
Allie 360 Camera Review: Unveiling the Future of Immersive Photography »
For stabilization, conisder the appropriate height; a monopod or tripod can be an indispensable tool here. According to VRdirect, scouting your location beforehand is vital. While shooting, make sure your camera is stable and at a height that captures the essence of the environment—it’s typically recommended that the camera be placed at eye level to create a natural viewpoint.


Shooting with a 360 Camera
https://www.youtube.com/watch?v=YuCl4vCo-Sw&embed=true
Entering the world of 360-degree content, you’ll immerse viewers in scenes as if they’re personally present. Your success hinges on mastering a few core principles—from video capture to exposure management.
Capturing 360-Degree Videos
To create immersive 360-degree videos, position your camera strategically to ensure every angle is covered. Think about your subject and visualize the story circle surrounding them. It’s not just about what’s in front of the lens—every direction is the ‘front’, and your capturing device should be centrally located to maintain this illusion. For example, learning that a 360 camera captures everything around it ensures that you consider your own position in the shot, as you may become part of the scene as well.
Photography Tips
When it comes to photography, your 360 camera is a powerful tool to capture high-quality panoramic images. Move smoothly to stitch photos seamlessly and pay attention to the lighting on all sides, because shadows and highlights in one direction can offset the balance in the panoramic shot. Aim to keep the horizon level to avoid a sloped or curved final image. Reflections and light sources require careful consideration to minimize glare and lens flares that can detract from the immersive experience.
Managing Exposure and Lighting
Proper exposure and lighting are crucial for capturing clear and crisp 360 content. Your camera likely has automatic exposure settings, but for the best results, manual adjustment may be necessary when dealing with varied lighting conditions. Maintain a consistent exposure as the camera rotates, because dramatic changes in light can result in stitched videos with clear ‘seams.’ When possible, plan your shots during times of consistent natural light, like the golden hour, to ensure even exposure across your 360-degree video or photograph.


Optimizing Camera Settings
https://www.youtube.com/watch?v=ookBkbYO55s&embed=true
When you’re capturing 360-degree content, adjusting your camera settings is crucial to maximize image quality and resolution. Let’s ensure you’re getting the best possible shots with your camera.
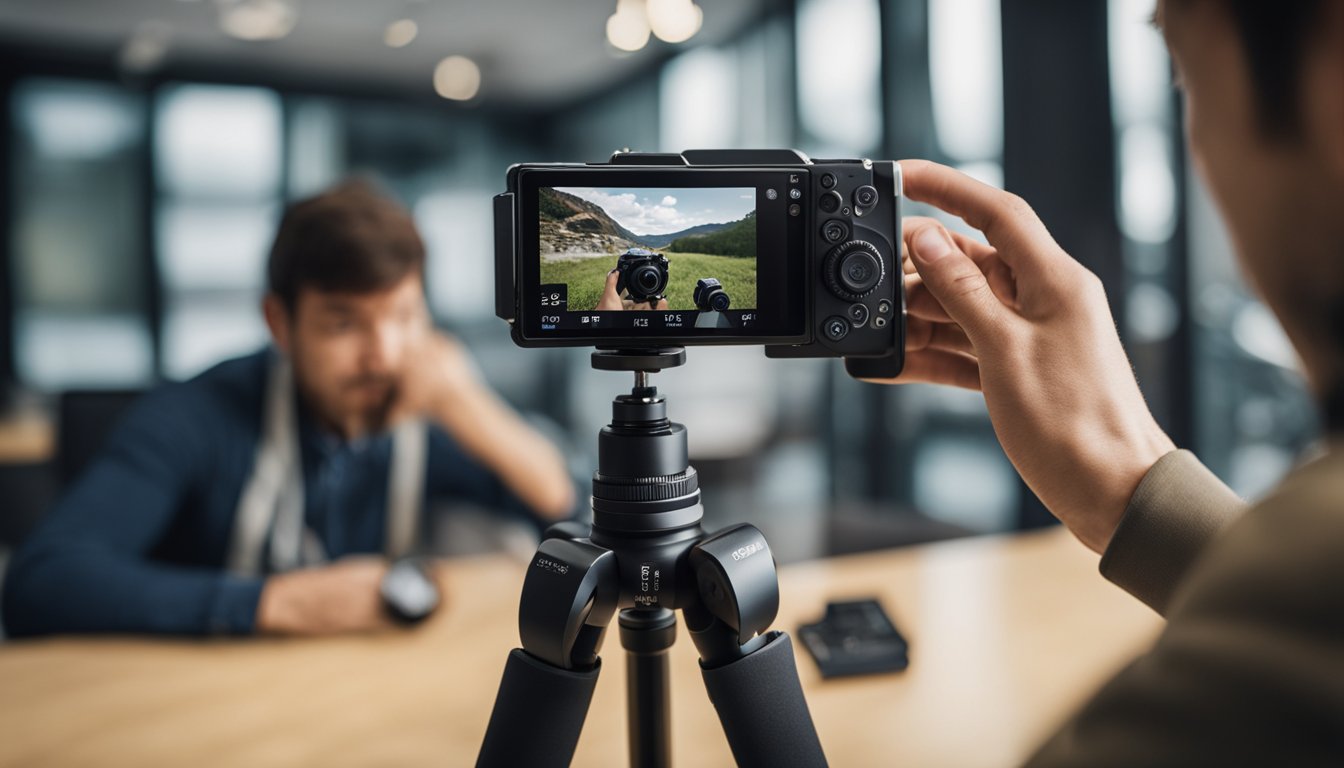
Resolution and Image Quality Settings
Your camera’s resolution setting is fundamental to the sharpness and detail of your photos and videos. Higher resolution means more pixels, which equates to finer detail. Most 360 cameras offer a range of resolution settings; always aim for the highest resolution possible to capture crisper images. However, remember that higher resolution files are larger and can fill up memory cards more quickly.
To maintain the highest image quality, pay attention to your camera’s ISO and shutter speed settings. A lower ISO minimizes digital noise, especially in low-light conditions. Adjusting the shutter speed can help prevent motion blur, ensuring that even moving subjects are captured clearly in your spherical shots.
For insights on professional workflows in 360 photography, the camera settings and other recommendations visit this page on the best camera settings for more detailed guidance.
Advanced Settings for Professionals
If you are a professional looking to get the most out of your 360 camera, delve into the advanced settings. Stitching options can be fine-tuned to minimize seams where images are combined. Exploring white balance and color grading tools will ensure your photos have a natural look under various lighting conditions.
Professionals should also consider experimenting with manual exposure controls to tackle challenging lighting and contrast scenarios effectively. Additionally, utilizing features like RAW shooting can provide more latitude in post-processing, allowing for corrections and adjustments without compromising on image quality.
For specialized tips, especially when using specific camera models like the Insta360, you could explore the Ace Pro tips to get a deeper understanding of how to enhance your 360-degree video production with high-quality results.
Accessories for 360 Cameras
https://www.youtube.com/watch?v=Bee3ycTjI1Q&embed=true
To make the most out of your 360 camera, certain accessories are indispensable for capturing high-quality footage and enhancing your virtual reality (VR) experiences. These tools can transform how you interact with the camera and the content you create.
The Invisible Selfie Stick
When filming with 360 cameras like the Insta360 One X2, the invisible selfie stick is a game-changer. Unlike traditional selfie sticks, this accessory is designed to be automatically erased from your footage, creating the illusion that your camera is floating. This means you can capture more immersive shots without the stick appearing in your videos or photos.
- Benefits:
- Keeps camera steady: Stabilizes your shots for clearer images.
- Adds unique perspective: Achieves unique angles and viewpoints without showing the stick.
- Versatile: Compatible with various models, including GoPro and Ricoh cameras.
Enhancing VR Experiences with Accessories
To fully immerse yourself in the content you’ve captured, using a VR headset is essential. It allows you to dive into the world you’ve recorded and experience it as if you’re there again. Furthermore, additional accessories can enhance sound quality and viewer engagement, making your VR journey more compelling.
- VR Headset Integration:
- Practice: Use a VR headset to preview your 360 videos to ensure you’re capturing the full scene as intended.
By utilizing these accessories, your 360 photography and videography will not only improve in quality but also in the depth of the immersive experience you can offer your viewers. Whether you’re using an Insta360, a GoPro, or a Ricoh camera, these tools are vital for any 360 camera enthusiast.
Editing and Post-Processing
https://www.youtube.com/watch?v=HdvFlaZLk24&embed=true
After capturing your 360-degree footage or photos, the process of editing and post-processing is crucial to create a polished and immersive experience. Your aim is to stitch the footage seamlessly, refine the image or video quality, and produce content that’s engaging for viewers to interact with.
Essential Editing Software
To begin editing your 360 content, you’ll need software capable of handling panoramic images and videos. Software like Adobe Premiere Pro or Insta360 Studio are popular choices for video editing, offering robust features for trimming and refining your footage. For photos, programs such as GIMP can help adjust and refine your images post-shooting.
- Video Editing: Look for features in your software that support 360-degree video timelines, allow adjustments for the stitch line, and provide tools for keyframing to animate your shots.
- Photo Editing: Choose a program that can handle panorama stitching, offers projection adjustments, and allows you to crop and manipulate the image without losing the immersive quality.
Editing Techniques for Immersive Content
When crafting immersive content, a few key editing techniques can make a big difference:
- Stitching: Use your software’s stitch line correction features to blend the edges of your footage, making the transition between camera views invisible.
- Cropping: Smart cropping is essential to frame your content well and draw the viewer’s attention to the intended areas.
- Refinement: Apply color correction, sharpen the image, and adjust the brightness or contrast to enhance the overall visual appeal.
Remember, the goal is to create an engaging and seamless viewing experience, so pay close attention to details in the post-production phase.
Sharing and Publishing 360 Content
https://www.youtube.com/watch?v=cViQTR7N_58&embed=true
When you’ve captured stunning 360-degree photos or videos with your camera, it’s time to bring them to life online. Sharing your panoramic content can immerse viewers in your experience, creating an interactive and engaging way to connect. Here’s how to get your 360 content seen and enjoyed on popular platforms.
Uploading to Social Media Platforms
Facebook: Uploading your 360 photos to Facebook is straightforward—just upload them like you would with a standard image. However, ensure your file has the correct metadata for Facebook to recognize it as a 360 photo.
- For videos, use the ‘360 Mode’ when uploading and include ‘#360Video’ in your post to enhance visibility.
YouTube: To share on YouTube, verify that your video file includes 360 metadata. If it doesn’t, you can use YouTube’s own 360 Video Metadata app before uploading to ensure your viewers can interact with your content properly.
- Remember to choose ‘Public’ or ‘Unlisted’ to control who sees your video.
- After uploading, check your video’s ‘Advanced settings’ to improve searchability with tags and descriptions.
Vimeo: For a more professional audience, Vimeo supports 360 content and offers various privacy controls, like password protection and domain-level restriction.
- When you upload, select the ‘360’ checkbox and provide an engaging title and description.
Best Practices for Engagement
To maximize viewer engagement:
Tell a Story: Weave a narrative around your content to guide viewers, suggesting what to look out for in your 360-degree scene.
Quality is Key: Invest time in editing your content to enhance its visual appeal, ensuring a clear and stable viewing experience.
Interact with Your Audience:
- Actively respond to comments and questions to foster a community around your content.
- Use analytics to understand viewer preferences and tailor your future uploads accordingly.
By focusing on these specifics, your 360-degree content won’t just be shared — it’ll be experienced.
Connecting with Viewers
https://www.youtube.com/watch?v=AaE8ysqxviY&embed=true
When you’re using a 360 camera, your goal is often to create a bond with your audience by immersing them in your story or environment. 360-degree video offers a unique opportunity to enhance viewer engagement through compelling storytelling and interactive experiences.
Storytelling in 360-Degree Format
In the realm of 360-degree storytelling, you’re not just guiding viewers through a narrative, you’re inviting them to be a part of it. To effectively tell a story, you need to consider every angle and how your audience might interact with the environment. You might start by placing the camera in a position where the action naturally unfolds around it while ensuring that key elements of your story are within the viewer’s sight at all times.
Creating Interactive Experiences
Interactive experiences in 360 video encourage viewers to explore and participate more deeply with the content. For example, during an adventure video, you could prompt viewers to look for hidden objects or to choose which path to take at a fork in the road. By doing this, you not only make viewers part of the story but also give them a sense of control and agency within your video.
360 Cameras for Beginners
https://www.youtube.com/watch?v=8ZPmzuT46UU&embed=true
Entering the world of 360 cameras opens a horizon of possibilities for your photography. You’ll be capturing everything around you, making no moment uncaptured and no angle unseen.
Starting with 360 Photography
As a beginner, diving into 360 photography may seem daunting, but it’s really about embracing a new perspective. The Insta360 One R, for instance, is designed to be user-friendly. It offers a modular system that’s straightforward to handle, even if you’re just stepping into the world of all-encompassing photography. Remember to keep these points in mind:
- Familiarize Yourself with the Gear: Get to know the parts of your camera. A 360 camera like the Insta360 One X2 has dual lenses, so practice shooting and handling it to understand how it captures the surrounding space.
- Experiment with Different Settings: Start with automatic settings, then gradually explore manual adjustments to gain control over your shots.
Transitioning from Traditional Cameras
If you’re coming from a background in traditional photography, you’ll notice that the approach to framing and composition is entirely different.
- Embrace the Full Scene: Unlike a traditional camera, a 360 camera captures everything around it. With devices like the Pixpro, there’s no need to focus on a single frame; the entire environment becomes your canvas.
- Learn the Basics of Stitching: These cameras typically use software to stitch images from two or more lenses together, creating a spherical view. Understanding this process helps you anticipate how to position yourself and the camera in the environment for the best results.
By starting with familiarization and experimentation followed by embracing the differences and learning new techniques, you’ll be well on your way to mastering 360 photography.
Maintaining Your 360 Camera
Taking good care of your 360 camera ensures it remains in top working condition. By following regular maintenance routines and knowing how to troubleshoot common issues, you can extend the lifetime of your camera significantly.
Regular Camera Care
Keep Lenses Clean: The lens is the eye of your 360 camera, capturing everything in its view. To preserve image quality, gently wipe the lens with a microfiber cloth before and after use to remove dust or fingerprints.
Protect Sensor and Fan: The sensor is crucial for capturing images, and the fan helps prevent overheating. Make certain to store your camera in a dry place and use a blower to remove dust from these sensitive parts.
Troubleshooting Common Issues
Battery Problems: If your camera powers off unexpectedly, check the battery connections and ensure it’s properly charged. If issues persist, consider resetting your camera or replacing the battery.
Connectivity Concerns: A common issue is the camera not connecting to your app or computer. Make sure the firmware is up to date and reset your camera’s Wi-Fi settings if necessary. If problems continue, contact manufacturer support for your specific model.
The Future of 360 Cameras
https://www.youtube.com/watch?v=i8EUerX90-0&embed=true
360 cameras are changing the way you capture and experience the world. With virtual reality (VR) becoming more mainstream and 360-degree video capabilities constantly evolving, expect to see further integration of these technologies in various sectors, from entertainment to education.
Trends in VR and 360-Degree Video
The immersive nature of VR and 360-degree video is rapidly gaining popularity. You’re now seeing platforms like YouTube and Facebook supporting 360-degree content, allowing you to dive into videos as if you’re part of the scene. The Samsung Gear 360 has played a significant role in popularizing this format by making it accessible to consumers and professionals alike.
On the horizon, expect VR experiences to become more interactive. As the hardware becomes more affordable and user-friendly, your ability to create and share content will only grow. The integration with social media could make 360-degree content a regular part of your online experience, providing a new dimension to how you interact with the world.
Emerging 360 Camera Technologies
In terms of hardware, emerging 360 camera technologies are continually pushing the bounds of what’s possible. The Insta360 X3, for example, is a camera revolutionary for its compact size and high-quality output. Expect to see 360 cameras becoming even smarter, with features such as AI-driven editing tools that help you create professional-looking content with ease.
The Ricoh Theta series showcases another leap forward with its high-resolution sensors and ability to live stream 360-degree content, making it a potential game-changer for live events and real-time journalism. As these technologies develop, your capability to capture every angle of a moment in crisp detail will become the norm, propelling the adoption of 360 cameras further into the mainstream.
Frequently Asked Questions
https://www.youtube.com/watch?v=5xds4olIjw0&embed=true
This section provides you with targeted advice on using various 360 cameras across different devices and contexts to ensure you get the best results from your equipment.
What are the steps to record with an Insta360 X3?
To record with an Insta360 X3, turn on the camera, select video mode, and simply press the shutter button. The camera will capture everything around you in full 360 degrees.
What are the best practices for shooting a 360 video with an iPhone?
When shooting a 360 video with an iPhone, use a compatible 360 camera attachment, ensure that it is securely fastened, and record in a steady, smooth motion to avoid shaky footage.
How do I operate a 360-degree security camera effectively?
For effective operation of a 360-degree security camera, mount it in a central location, adjust the lens angles for optimal coverage, and regularly check and update the camera’s software for peak performance.
What are the initial setup instructions for the Insta360 One X?
For the initial setup of the Insta360 One X, charge the camera, install the Insta360 app on your device, pair the camera with your smartphone via Bluetooth, and update the camera’s firmware if needed.
How can I utilize a 360 camera on my Android device?
To utilize a 360 camera on your Android device, connect the camera to your smartphone, launch the camera’s app to control the camera from your phone, and start capturing immersive 360 images or videos.
What’s the process for using the Insta360 Flow feature?
To use the Insta360 Flow feature, ensure your Insta360 camera is updated to the latest firmware, select the FlowState stabilization option in the app, and start recording to get smooth, gimbal-like stabilized video output.