Creating a virtual tour with a 360 camera allows you to capture environments in a fully immersive way that traditional photography cannot match. With the advent of accessible technology, it’s now easier than ever to produce virtual tours that can transport viewers to your space with the click of a mouse. Whether it’s for a real estate listing, an educational project, or a virtual exhibit, 360-degree cameras provide a comprehensive view that satellite your audience right into the environment you’ve captured.
Before starting, selecting the right 360 camera is crucial as it affects the quality and ease of creating your virtual tour. After your camera choice, understanding the process of shooting, stitching together your photos, and employing the right software for editing is vital to creating an interactive and engaging virtual tour. By seamlessly linking different scenes and adding information points, your tour can offer a wealth of information to your viewers and keep them engaged.
Key Takeaways
- Utilizing a 360 camera can enhance virtual tours with immersive experiences.
- Choosing the appropriate equipment and software is fundamental for quality.
- Detailed editing and strategic publishing extend the reach of your tour.
Understanding Virtual Tours
https://www.youtube.com/watch?v=TOd_VYOKMm0&embed=true
Virtual tours offer a digital representation of a location, allowing you to visit and explore spaces remotely. This experience can be particularly beneficial for businesses by enhancing their branding and engagement with customers.
Defining a Virtual Tour
A virtual tour is an interactive, 360-degree view of a space that you can navigate from the comfort of your own home. Leveraging high-quality imagery from a 360-degree camera, these tours simulate the experience of physically being in a location. You might find yourself virtually walking through a potential home, exploring a museum, or evaluating the layout of a corporate office.
Benefits for Businesses
Virtual tours can serve as a powerful tool for businesses across various industries, particularly in real estate, where they can significantly enhance property listings. Here’s how virtual tours can benefit your business:
- Increased Accessibility: Potential customers can visit your property or space anytime, from anywhere in the world.
- Enhanced Engagement: By offering an immersive experience, virtual tours keep visitors interested and engaged longer than traditional photos.
- Strategic Branding: Use virtual tours to strengthen your branding. They showcase your commitment to technology and customer service.
Incorporating virtual tours into your business strategy could give you a competitive edge and make your brand stand out.
Choosing the Right 360 Camera
https://www.youtube.com/watch?v=5MvtlBYOFHg&embed=true
When you’re ready to create virtual tours, the first step is choosing a 360 camera that meets your needs for image quality and functionality.
Camera Specifications
Resolution: It’s crucial to start with the camera’s resolution since this will affect the quality of your virtual tours. Cameras like the Ricoh Theta Z1 provide high-resolution images, which are essential for creating detailed and immersive virtual tours.
- Image Quality: Look for cameras that offer High Dynamic Range (HDR) capabilities to ensure your images have vibrant colors and high contrast. This feature can help your tours stand out, especially for property showcases where lighting conditions vary.
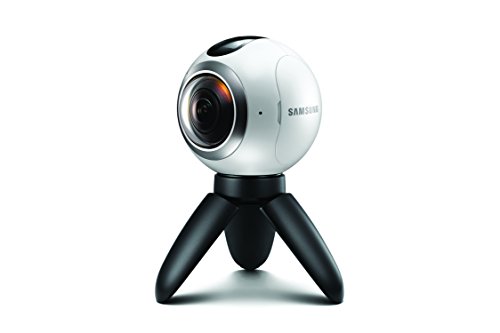
Popular 360 Camera Models
Several models have gained popularity due to their balance of quality, features, and price:
Ricoh Theta Z1: Known for its excellent image quality with a 1-inch sensor, the Theta Z1 can capture 360-degree photos at 23MP, making it a favorite among professionals.
Samsung Gear 360: If you’re looking for a more budget-friendly option, the Samsung Gear 360 is compact and offers a simple, easy-to-grip body, suitable for live broadcasting and 4K recording.
« 360 Camera Pros and Cons: Unveiling the Advantages and Challenges
Remember to consider how the camera feels in your hands and whether its portability suits your needs, as you’ll be moving it to various locations for your tours.


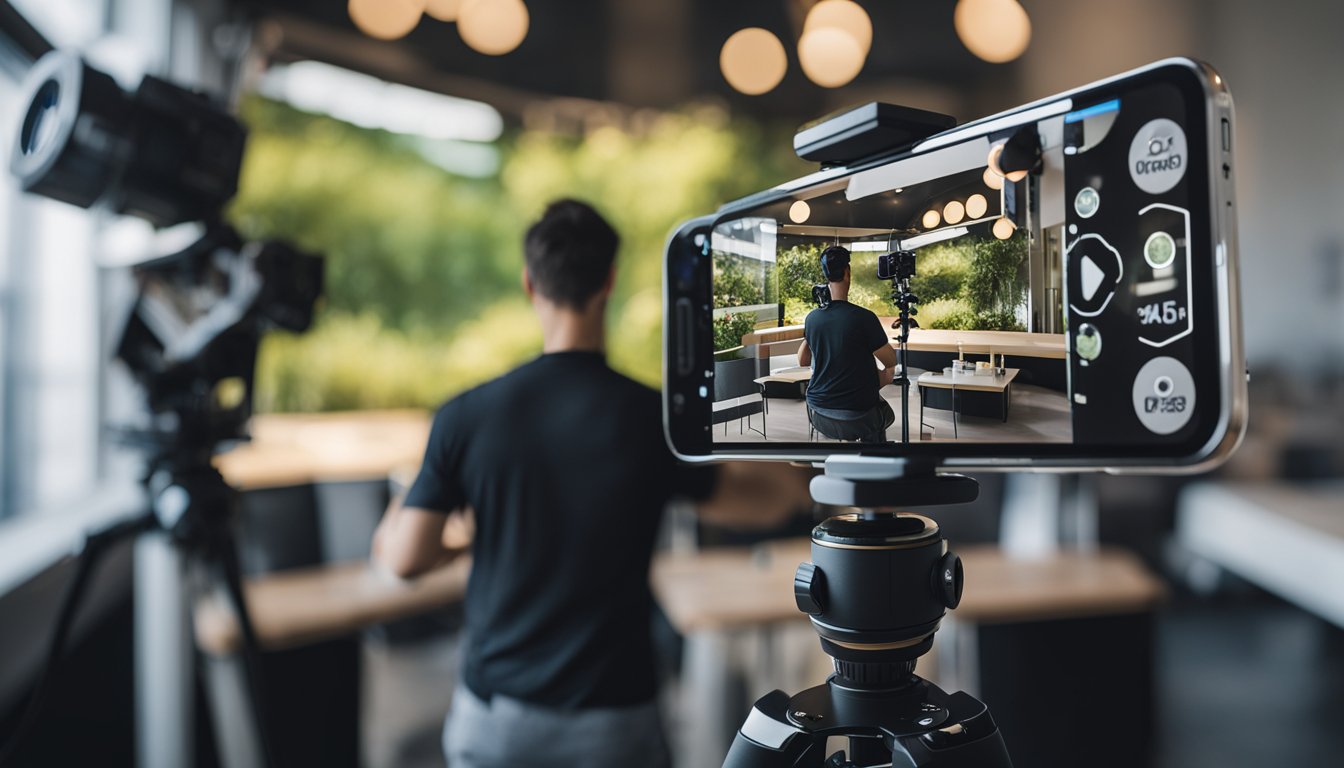
Preparation for Shooting
https://www.youtube.com/watch?v=x2hjzfovwe8&embed=true
Before you start capturing your virtual space, proper preparation is critical to ensure that your virtual tour stands out. From picking out the perfect location to adjusting your camera settings, every detail counts towards crafting a visually stunning tour.
Selecting the Location
When choosing your location, find the center of the room as this will be your starting point. This central positioning allows you to capture the entire area uniformly, giving viewers a natural sense of the space. Make sure the room is tidy, clutter-free, and represents the environment you want to portray.
Setting up the Camera
Your tripod is your best friend when it comes to shooting with a 360 camera. It ensures stability and an even level, which is crucial for seamless stitching in post-production. Fix your camera on the tripod, and adjust the ISO and exposure settings to match the lighting conditions. Aim for the lowest ISO you can to avoid noise in your images.
- Camera Settings Checklist:
- ISO: Set as low as possible
- Exposure: Adjust to prevent highlights from blowing out
- Tripod: Secure and level to avoid tilt in images
Optimizing the Lighting
Good lighting can make or break your virtual tour. Natural light is preferable, but if you shoot indoors, turn on all the lights to brighten the space. Avoid strong direct light that can cause glare and keep an eye on shadows. If possible, shoot during the ‘golden hour’ for the most flattering natural light.


- Lighting Tips:
- Use soft, natural light when available
- Eliminate harsh shadows and glare
- If needed, use additional lighting to brighten dark areas
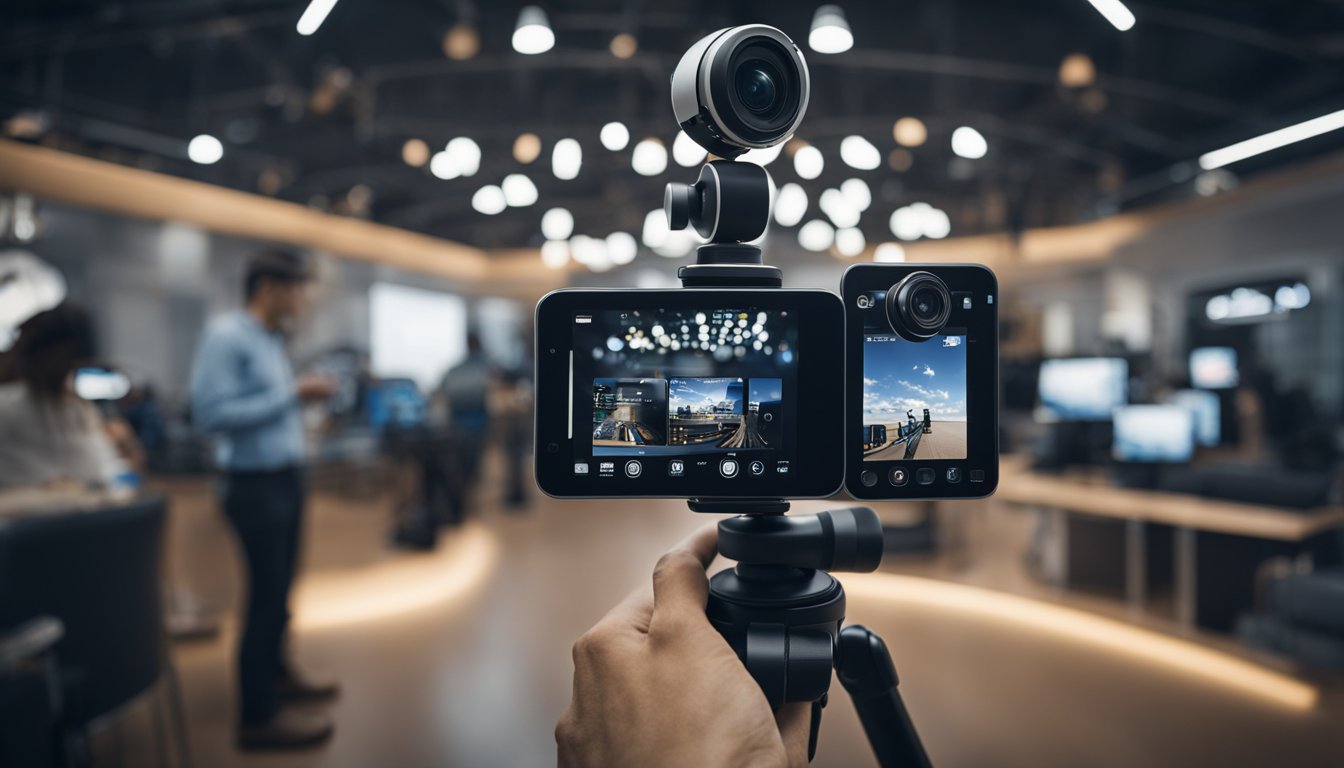
Capturing 360 Photos
https://www.youtube.com/watch?v=cRzBL4fhDnM&embed=true
When creating a virtual tour, capturing high-quality 360 photos is fundamental. You’ll need to understand the right shooting techniques and ensure you’re covering all angles to create an immersive experience.
Shooting Techniques
To shoot 360 photos, first you must set up your 360 camera with optimal camera settings. Choose a resolution that balances file size with quality and adjust the exposure to prevent washed-out images. Many 360 cameras offer a remote control function, which allows you to capture images without physically touching the camera, thus avoiding accidental movements or being in the shot.
Tips for Shooting:
- Use a tripod for stability.
- Select manual mode for consistent exposures across shots.
- Take test shots to check your settings.
Covering All Angles
To ensure full immersion in your virtual tour, you must capture every angle of the space. Stand your camera at various points within the location and use its wide field of view to its advantage. Take multiple shots from different positions, making sure there are overlapping areas to aid in stitching the photos together.
Checklist for Coverage:
- Shoot from the center and corners of the room.
- Tilt the camera up and down to get ceiling and floor.
- Confirm there are no blind spots in the final 360 photos.
By following these steps, you’ll be able to create an engaging virtual tour through well-captured 360 photos.
Creating a Virtual Tour
https://www.youtube.com/watch?v=NjLrhF5qo4M&embed=true
Creating a virtual tour involves capturing panoramic images with a 360-degree camera and piecing them together to provide an immersive experience. You’ll need to edit your images, add interactive elements like hotspots, and incorporate multimedia to make your tour engaging.
Stitching 360 Photos
Firstly, after capturing your images with a 360-degree camera, you’ll need to stitch them together. This process creates a seamless spherical panorama that represents the space accurately. Use specialized software to align and integrate your photos into a single panorama.
Instructions:
- Import your 360 photos into stitching software.
- Align the images automatically or manually adjust for precision.
- Export the stitched panorama in a format suitable for virtual tours.
Adding Hotspots and Navigation
To create a smooth flow within your virtual tour, add hotspots, which are interactive markers that viewers can click to navigate from one scene to another. Hotspots enhance your tour by allowing users to explore the space as if they were there.
Steps:
- Place hotspots in logical locations to guide the viewer’s journey.
- Ensure the transition from photo to photo is seamless for an intuitive experience.
- Customize hotspots with icons or labels for clarity.
Incorporating Multimedia Elements
Enhance your virtual tour by integrating multimedia elements like background music, narration, or video clips. This adds depth to the story of your space and provides a richer experience.
To add multimedia:
- Use your virtual tour editor to embed audio or video files.
- Ensure multimedia elements do not disrupt the navigation but complement the visual content.
- Align multimedia with specific hotspots for a context-specific appeal.
Editing and Customizing the Tour
https://www.youtube.com/watch?v=ksHQiLZnnbg&embed=true
When crafting your virtual tour, the editing phase is crucial to achieving a polished and engaging experience. It’s here that you fine-tune your images and tailor the tour to your vision using specific software and enhancement techniques.
Using Editing Software
After capturing your scenes with a 360-degree camera, your first step is to import your images into editing software. Select a program tailored for 360 editing, which will allow you to stitch together your photos seamlessly. A reputable editing platform will enable you to insert navigation elements and embed information such as text annotations or video overlays to customize your virtual tour.
Enhancing Image Quality
To ensure your virtual tour displays crisp and visually appealing scenes, focus on enhancing the image quality during post-processing. Use the HDR (High Dynamic Range) function to balance the lights and darks, bringing out the detail in your images. Additionally, sharpen the visuals and adjust the colors for a more realistic and immersive experience. It’s essential to review each photo for consistency to make sure your final tour is cohesive and professional.
Hosting and Publishing Online
https://www.youtube.com/watch?v=8lIR98oJouE&embed=true
Once you’ve captured your 360 virtual tour, the next step is to share it with the world by selecting the right hosting platform and understanding how to upload it effectively to your website or blog. This will make your virtual tour accessible to viewers anytime and anywhere.
Choosing a Hosting Platform
Your choice of a hosting platform is crucial for the access and visibility of your virtual tour. Look for hosting services that specifically support 360 content, like CloudPano, which specializes in creating and displaying virtual tours in 360° and VR. Ensure that the platform you choose is compatible with various devices and web browsers to reach a wider audience. Another aspect to consider is the quality and interactivity features offered by the hosting service, as these will significantly enhance the viewer’s experience of your virtual tour.
Uploading to a Website or Blog
To upload your 360 virtual tour to a website or blog, you’ll usually need to follow the specific instructions provided by the hosting service. For instance, platforms like WordPress have dedicated plugins such as WP VR, allowing you to create and embed 360 panoramas and virtual tours directly into your posts or pages. Remember, when publishing your virtual tour:
- Optimize the file size to ensure quick loading times without compromising on the quality.
- Use an embed link provided by your virtual tour software to integrate the tour seamlessly into your site.
- Double-check that navigation through the tour is intuitive and that all linked scenes work correctly after uploading.
By attentively managing these steps, your virtual tour will be ready to capture the attention of online visitors, offering them an immersive experience of the space you’re showcasing.
Sharing and Marketing Your Virtual Tour
https://www.youtube.com/watch?v=UoCgA2pGW40&embed=true
Creating a virtual tour with a 360-degree camera can boost your visibility. Once your virtual tour is ready, sharing it widely and tracking its performance is key. Use various platforms and tools to showcase your space to prospective clients or customers.
Integrating with Social Media
To maximize exposure, share your virtual tour on popular social media platforms like Facebook and YouTube. Facebook allows you to post 360-degree content directly:
- Facebook: Upload directly and use Facebook Ads for targeted campaigns.
For YouTube, embed the tour in your video content:
- YouTube: Create a walkthrough video, embed your tour, and add a call-to-action.
Utilizing Marketing Tools
Marketing tools can help you effectively distribute and promote your virtual tour. Some platforms offer built-in features for showcasing 360-degree content. Consider the following:
- Email Campaigns: Send your tour to a curated email list using a tool like Mailchimp.
- SEO Optimization: Use keywords in your tour’s description to improve searchability.
Analyzing Engagement with Analytics
To understand your audience’s behavior, use analytics tools. They give insights into how viewers interact with your tour:
- Google Analytics: Track views and duration of engagement.
- Social Media Insights: Evaluate likes, shares, and comments for performance.
By following these steps and regularly analyzing your data, you can refine your approach, ensuring your virtual tour reaches the right audience and has the desired impact.
Extending the Experience
https://www.youtube.com/watch?v=r7QtoFy_0FI&embed=true
Creating a captivating virtual tour involves more than just panoramic images; it’s about delivering an experience that feels as real as being there. You can achieve this by expanding the accessible ways to view the tour and adding dynamic, interactive elements.
Offering VR and Mobile Compatibility
To bring your virtual tours to life, ensure they are compatible with virtual reality (VR) devices. This compatibility allows users with VR headsets, like Google Cardboard, to step into an immersive experience. For instance, when you create a virtual tour, it should be accessible not just on desktops but also on iOS and Android platforms. This mobile compatibility is crucial because it allows a wider audience to explore your 360-degree images wherever they are, directly from their smartphones.
Interactive Features and Live Video
Interactive features, such as informational hotspots or live video chat, elevate your virtual tour from a passive viewing to an engaging experience. Here’s a quick guide:
- Informational Hotspots: Embed points of interest that users can click to learn more about a particular spot or object within the 360-degree scene.
- Live Video Integration: Incorporating a functionality for live video calls can simulate a real-life tour guide experience.
These elements not only extend the experience but also provide a way for you to communicate with participants in real time, answering questions and guiding them through the space.
Monetizing Virtual Tours
https://www.youtube.com/watch?v=LQAwvxlbDLg&embed=true
Creating a virtual tour with a 360 camera can be more than just a visual feast; it’s a lucrative opportunity. By exploring payment models and lead generation strategies, you can turn your virtual tours into a steady source of income.
Payment and Subscription Models
When you decide to monetize your virtual tours, you have several payment models to choose from. You can offer:
- Single Purchase: Customers pay once to access a tour.
- Subscription-Based Access: A recurring payment model where customers pay to access a selection of tours over a period.
- Freemium Model: Provide basic tours for free and charge for premium features.
Remember, simple pricing structures are generally more appealing, so keep your models straightforward and transparent.
Generating Leads
Lead capture is essential for monetization. Implement strategies like:
- Contact Forms: Integrate these on your tour page to collect visitor information.
- Newsletter Sign-ups: Offer valuable insights or discounts to encourage users to subscribe.
- Special promotions linking to your virtual tours can also be a gateway to gather leads.
Developing an effective pricing strategy and focusing on capturing leads are key steps in turning your virtual creations into a profitable business.
Advanced Virtual Tour Techniques
https://www.youtube.com/watch?v=Duu1N9ZFhuk&embed=true
Creating a comprehensive virtual tour requires a mix of technical know-how and creativity. As you dive into advanced techniques that transform ordinary virtual tours into immersive experiences, you’ll learn to integrate detailed 3D models and innovative photography services that capture every angle.
Creating 3D Models and Floor Plans
To create 3D models, you should invest in sophisticated 360° virtual tour software that can construct dimensionally accurate representations from your photographs. Carefully capture every corner of your space with your 360 camera, ensuring there’s sufficient overlap between images for flawless stitching. Some software can automatically generate a 3D model from these images, which allows you to offer interactive floor plans, truly elevating the user’s experience in navigating through the space.
For floor plans, consider using laser scanners in tandem with your 360 camera, particularly ones compatible with your virtual tour software. With these floor plans in place, users can understand the layout of the space before delving into the 3D tour, creating a logical flow that mimics the experience of walking through the property in real life.
Innovative 360° Photography Services
When looking into 360º photography services, choose providers that showcase a portfolio of high-quality, dynamic tours. These professionals not only have the eye for the right shot but also the understanding of advanced lighting and stitching techniques that make a tour seamless.
- Dynamic Range: Ensure that your photography services offer HDR (High Dynamic Range) to capture spaces in varying lighting conditions without losing detail.
- Seamless Stitching: Opt for services skilled in meticulous stitching, so transitions between images in your tour are smooth, enhancing the overall sense of realism.
Including elements like interactive hotspots, detailed close-ups of important features, and even ambient soundtracks can add depth to your virtual showcase. These subtle enhancements can make the virtual exploration an informative and engaging journey for your audience.
Frequently Asked Questions
Before diving into your virtual tour creation journey, here are some concise answers to common inquiries that can help streamline the process.
What is the best software for stitching 360 photos into a virtual tour?
Many professionals find CloudPano a robust choice for stitching 360 photos into a virtual tour due to its user-friendly interface and rich feature set.
Which 360 camera is recommended for real estate virtual tours?
For real estate virtual tours, the Ricoh Theta Z1 is often recommended for its high image quality and ease of use, but there are also affordable options like the Insta360 cameras that are popular among professionals.
Can you create a virtual tour directly on a mobile app?
Yes, you can create a virtual tour directly on a mobile app. Some apps allow you to use your phone’s camera to capture 360 tours, making it an accessible option for beginners.
What equipment is needed for creating a high-quality 360 virtual tour?
You will need a 360 camera, a tripod with a rotator, and proper lighting. High-quality images contribute to a more immersive virtual tour, so investing in a good camera and enhancing the lighting can make a significant difference.
How can I upload and share my 360 virtual tour on Google Maps?
To upload and share your tour on Google Maps, use the Street View app to publish your images and then connect them to create a seamless virtual tour experience for viewers.
What are the steps to record a 360 virtual tour using the Insta360 camera?
Follow the camera’s manual for setting it up, then use the Insta360 app or similar software to record and stitch the footage. Make sure to plan your path and keep a steady pace to ensure smooth transitions between shots.