If you’re looking to showcase your photography skills and impress your followers on social media, then the Camera 360 Before After app might be just what you need. This app allows you to create stunning before-and-after photos with ease, using your smartphone’s camera and a variety of creative filters and styles. Whether you’re a professional photographer or just starting out, this app is a great tool for taking your photos to the next level.
With the Camera 360 Before After app, you can easily shoot and edit 360 photos, optimize exposure settings, and extend your reach on social media. The app offers a range of cost-effective solutions for creating professional-quality photos, making it accessible to anyone who wants to improve their photography skills. Whether you’re looking to take the perfect selfie or capture stunning landscapes, this app has everything you need to create beautiful, high-quality photos.
So if you want to take your photography skills to the next level and create stunning before-and-after photos that will impress your followers on social media, be sure to check out the Camera 360 Before After app. With its user-friendly interface and powerful editing tools, this app is a must-have for anyone who wants to take their photography skills to the next level.
Key Takeaways
- The Camera 360 Before After app allows you to create stunning before-and-after photos with ease.
- With a range of creative filters and styles, you can easily optimize exposure settings and extend your reach on social media.
- Whether you’re a professional photographer or just starting out, this app is a great tool for taking your photos to the next level.
Understanding 360 Cameras
If you’re new to 360 photography, it can be a bit overwhelming to understand how it works. But don’t worry, we’ve got you covered! In this section, we’ll cover the basics of 360 photography and the key features of 360 cameras.
Basics of 360 Photography
360 photography is a type of photography that captures a 360-degree view of a scene. Instead of capturing a single image, 360 cameras use multiple lenses to capture a 360-degree view of everything around it. This allows you to capture a more immersive and interactive experience for your viewers.
One of the key benefits of 360 photography is that it allows you to capture everything in a scene, including what’s behind you. This means that you can capture the entire environment, giving your viewers a more complete picture of what’s going on.
Key Features of 360 Cameras
When it comes to 360 cameras, there are a few key features that you should be aware of:
Resolution
The resolution of a 360 camera refers to the number of pixels that the camera can capture. The higher the resolution, the more detail you’ll be able to capture in your photos and videos. However, higher resolution cameras often come with a higher price tag.
Settings
Most 360 cameras come with a variety of settings that you can adjust to get the perfect shot. These settings might include things like exposure, white balance, and ISO. Make sure to experiment with these settings to find the perfect combination for your shots.
Wi-Fi
Many 360 cameras come with built-in Wi-Fi, which allows you to easily transfer your photos and videos to your phone or computer. This can be especially useful if you’re on the go and want to share your content quickly.
Coverage
When it comes to 360 cameras, coverage refers to the amount of the environment that the camera can capture. Some cameras have a full 360-degree coverage, while others might only capture a smaller portion of the environment. Make sure to choose a camera with the coverage that best fits your needs.
« Does Ring Make a 360 Camera? Exploring Ring’s Camera Options
Does Mercedes 360 Camera Record? Find Out Here! »
Overall, 360 cameras are a powerful tool for capturing immersive and interactive content. By understanding the basics of 360 photography and the key features of 360 cameras, you’ll be well on your way to capturing stunning 360-degree photos and videos.


Overview of Camera 360 Apps
If you’re looking to take stunning 360-degree photos and videos, you’ll need a camera 360 app. These apps come in a range of styles and functionalities, but they all share one thing in common: they allow you to capture immersive content that can be viewed from any angle.
App Compatibility
Camera 360 apps are compatible with a range of devices, including iOS and Android smartphones. This means that you can capture stunning 360-degree content using your mobile device, without the need for a dedicated camera.
Popular 360 Camera Apps
There are a variety of camera 360 apps available on the market, each with its own unique features and benefits. Some of the most popular 360 camera apps include:
- Google Street View: This app is perfect for capturing ready-made panoramas, and is available on both iOS and Android devices.
- Panorama 360 Camera: This app allows for instant stitching and is available on both iOS and Android devices.
- Cardboard: This app is great for streaming and recording, and is available exclusively on Android devices.
- Roundme: This social network app is available on both iOS and Android devices, and allows for easy sharing of 360-degree content.
- 360Cam: This app is perfect for remote control of the Giroptic 360 camera, and is available on both iOS and Android devices.
- 360 Panorama: This app offers 5 GB of built-in storage and is available exclusively on iOS devices.
No matter which camera 360 app you choose, you’re sure to capture stunning 360-degree content that will amaze and delight your friends and family.
Shooting with 360 Cameras
https://www.youtube.com/watch?v=RHejHmUZR_U&embed=true
Shooting with 360 cameras can seem daunting, but with a few tips and techniques, you’ll be capturing stunning 360 images and videos in no time. Here are some things to keep in mind when shooting with a 360 camera:
Capturing Techniques
Exposure: When shooting with a 360 camera, it’s important to pay attention to your exposure settings. Make sure you’re not over or underexposing your shots, as this can lead to loss of detail in your images. Most 360 cameras will have an auto-exposure setting, but it’s always best to double-check and adjust manually if necessary.
White Balance: Similar to exposure, white balance is important to ensure that the colors in your shots are accurate. Most 360 cameras will have an auto white balance setting, but it’s always best to double-check and adjust manually if necessary.
Timer: Some 360 cameras have a timer feature that allows you to set a delay before the camera takes the shot. This can be useful if you want to set up the camera and get out of the shot before it takes the picture.
Using a Selfie Stick
Using a selfie stick with your 360 camera can help you capture shots from unique angles and perspectives. Here are some tips for using a selfie stick:
Choose the Right Length: Make sure you choose a selfie stick that’s the right length for the shot you want to capture. A longer selfie stick can help you capture shots from higher angles, while a shorter one can help you capture shots from lower angles.
Be Careful of the Stick: When using a selfie stick, be careful not to get it in the shot. This can be difficult with a 360 camera, so make sure you’re aware of where the stick is at all times.
Use a Remote: Some selfie sticks come with a remote that allows you to take the shot without touching the camera. This can be useful if you want to avoid getting the stick in the shot.
By keeping these tips in mind, you’ll be able to capture stunning 360 images and videos with ease.
Editing 360 Photos
https://www.youtube.com/watch?v=Bw2NeIszgcg&embed=true
If you’re looking to edit your 360 photos, you’ll need an app that can handle the unique demands of this type of photo. Luckily, there are a few apps available that are specifically designed for editing 360 photos and offer a range of editing tools to help you get the most out of your photos.
Basic Adjustments
One of the first things you’ll want to do when editing your 360 photos is to make some basic adjustments. This might include adjusting the brightness and contrast, cropping the photo to remove any unwanted elements, and straightening the horizon. Most 360 photo editing apps offer these basic adjustment tools, and they’re a great place to start when you’re first getting started with editing your photos.
Advanced Editing Techniques
Once you’ve made some basic adjustments to your 360 photos, you might want to try some more advanced editing techniques. This might include adding filters to your photos, reshaping the image, or using HDR techniques to bring out more detail in the photo. Some 360 photo editing apps offer these advanced editing tools, and they can help you take your photos to the next level.
When using advanced editing techniques, it’s important to remember that less is often more. It can be tempting to go overboard with filters and other effects, but this can quickly make your photo look artificial and over-processed. Instead, focus on using these techniques to enhance the natural beauty of your photo and bring out its best features.
Overall, editing 360 photos can be a fun and rewarding experience, and with the right app and a bit of practice, you can create stunning photos that are sure to impress.
Sharing on Social Media
https://www.youtube.com/watch?v=T9qslAaN8Vs&embed=true
After editing your 360 photos with the Camera 360 Before After app, you may want to share them on social media. Here are some tips to help you share your photos on Facebook, Instagram, Twitter, and YouTube.
Facebook & Instagram
Facebook and Instagram are great platforms for sharing 360 photos. When you upload a 360 photo to Facebook, it automatically detects the photo’s metadata and displays it as a 360 photo. To make sure your photo is recognized as a 360 photo, you can use Google Street View or Kuula.co to add the metadata to your photo. You can also use the Camera 360 Before After app to add the metadata before sharing your photo on Facebook or Instagram.
To share a 360 photo on Instagram, you need to first convert it to a video format. You can do this using the Camera 360 Before After app or other video editing tools. Once you have the video, you can upload it to your Instagram feed or story.
Twitter & YouTube
Twitter and YouTube also support 360 photos and videos. When you upload a 360 photo or video to Twitter, it automatically detects the photo’s metadata and displays it as a 360 photo or video. You can use the Camera 360 Before After app to add the metadata to your photo or video before sharing it on Twitter.
To share a 360 photo or video on YouTube, you need to upload it in a special format called equirectangular. This format allows YouTube to recognize the photo or video as a 360 photo or video. You can use the Camera 360 Before After app to convert your photo or video to equirectangular format before uploading it to YouTube.
In conclusion, sharing your 360 photos on social media is easy and fun. Just make sure you add the necessary metadata and use the right format for each platform. With the Camera 360 Before After app, you can easily edit and share your photos on Facebook, Instagram, Twitter, and YouTube.
360 Before and After Effects
https://www.youtube.com/watch?v=tdA9SJgfz_U&embed=true
If you’re looking to transform your images and add a little extra flair, the Camera 360 Before and After app is a great tool to have in your arsenal. With a variety of filters and effects, you can easily enhance your photos and create stunning before and after comparisons.
Transforming Images
The Camera 360 Before and After app offers a wide range of filters and effects that allow you to transform your images into something truly unique. Whether you’re looking to add a retro vibe to your photos or simply want to create a black and white masterpiece, this app has you covered.
One of the standout features of this app is its ability to highlight wrinkles and other imperfections in your photos. With just a few taps, you can smooth out your skin and create a flawless look that’s sure to turn heads.
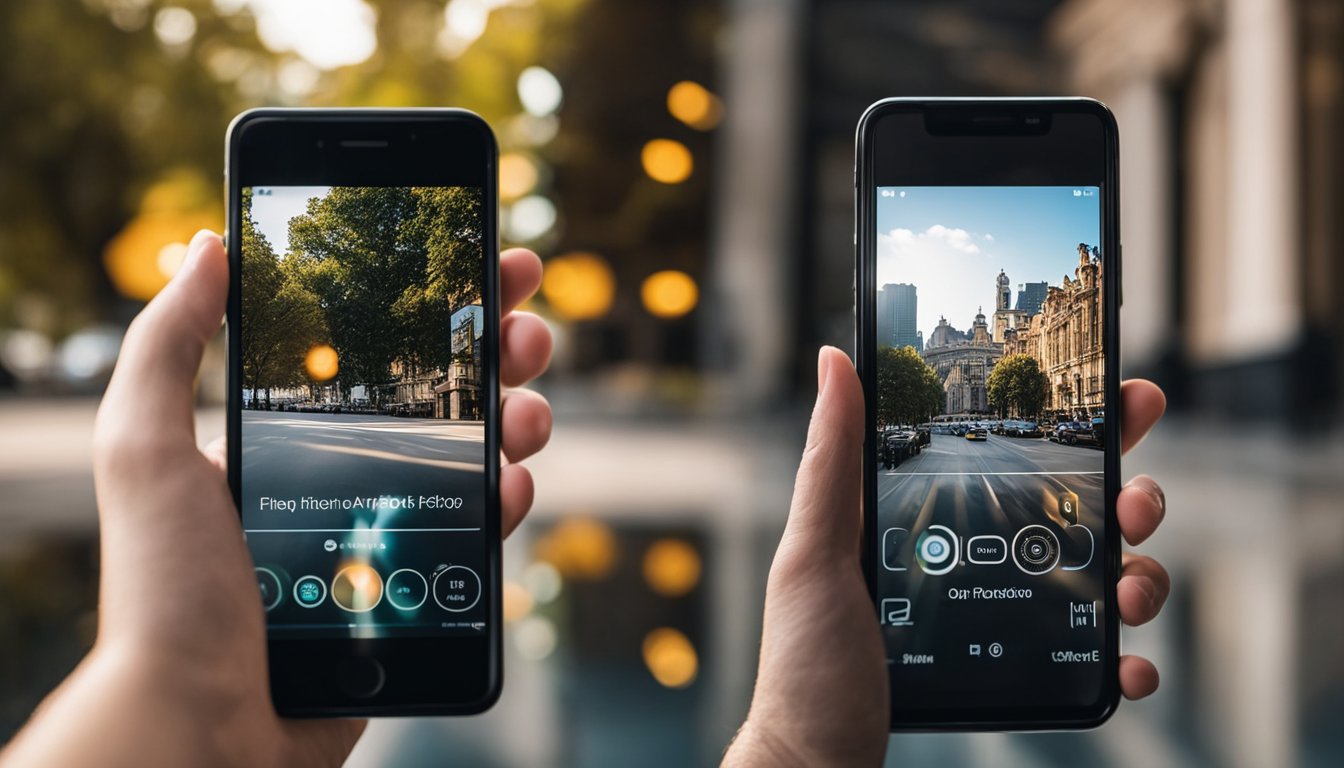
Comparison Views
One of the most useful features of the Camera 360 Before and After app is its comparison view. This allows you to see your original photo side by side with your edited version, so you can easily compare the two and make any necessary adjustments.
With just a few swipes, you can toggle between your original photo and your edited version, making it easy to see the difference your edits have made. This feature is especially useful if you’re trying to achieve a specific look or effect and want to make sure you’re on the right track.
Overall, the Camera 360 Before and After app is a great tool for anyone looking to enhance their photos and create stunning before and after comparisons. With its wide range of filters and effects, as well as its comparison view, you can easily transform your images and create something truly unique.
Creative Filters and Styles
The Camera360 Before After app comes with a wide range of creative filters and styles that can transform your photos into works of art. Whether you want to add a vintage look to your photos or create a dramatic black and white image, Camera360 has you covered.
Lomo and Retro Filters
Lomo and retro filters are perfect for adding a vintage feel to your photos. These filters mimic the look of old film cameras and can give your photos a unique and artistic look. Camera360 has a variety of lomo and retro filters to choose from, so you can find the perfect one for your photo.
Black and White, HDR
Black and white and HDR filters are great for creating dramatic and striking images. The black and white filter removes all color from your photo, leaving you with a high-contrast image that can be very powerful. The HDR filter, on the other hand, can bring out the details in your photo and make it look more vibrant and alive.
In addition to these filters, Camera360 also offers a variety of other creative styles and effects, such as vignettes, light leaks, and lens flares. These effects can add depth and dimension to your photos and make them stand out from the crowd.
Overall, the Camera360 Before After app is a powerful tool for anyone who wants to take their photos to the next level. With its wide range of creative filters and styles, you can transform your photos into works of art and create images that are truly unique and memorable.
Optimizing Exposure Settings
https://www.youtube.com/watch?v=czpKb0KDphc&embed=true
When it comes to taking 360-degree photos, getting the right exposure is essential. Poorly exposed images can be difficult to work with and may require extensive editing to correct. Here are some tips to help you optimize your exposure settings:
Adjusting White Balance
White balance is a critical setting that can significantly affect the look of your photos. It determines how your camera interprets the color temperature of the light in your scene. If your white balance is off, your photos may look too warm or too cool.
To adjust your white balance, you can use the presets on your camera or set a custom white balance. If you’re shooting in RAW, you can also adjust your white balance in post-processing.
Managing Highlights and Shadows
360-degree photos can be challenging to expose correctly, especially if you have a wide dynamic range in your scene. If you expose for the highlights, you may end up with dark shadows. If you expose for the shadows, you may end up with blown-out highlights.
One way to manage highlights and shadows is to use exposure bracketing. This technique involves taking multiple shots of the same scene at different exposures. You can then blend these images together in post-processing to create an image with a wider dynamic range.
Another technique is to use a graduated neutral density filter. This type of filter reduces the amount of light entering your lens on one side of the frame, allowing you to capture a more balanced exposure.
Contrast
Contrast refers to the difference between the lightest and darkest parts of your image. High-contrast scenes can be challenging to expose correctly, as you may end up with blown-out highlights or dark shadows.
To manage contrast, you can use exposure bracketing or a graduated neutral density filter, as mentioned above. You can also adjust your contrast in post-processing using software like Lightroom or Photoshop.
Optimizing your exposure settings is crucial when it comes to capturing high-quality 360-degree photos. By adjusting your white balance, managing highlights and shadows, and controlling contrast, you can ensure that your images look great straight out of the camera.
Extending Your Reach
https://www.youtube.com/watch?v=Ft8AKouicgU&embed=true
With a 360 camera before after app, you can capture stunning before and after images and videos with ease. But did you know that you can extend the capabilities of your app by utilizing its Wi-Fi capability and connecting it with accessories?
Utilizing Wi-Fi Capability
Most 360 camera before after apps come with built-in Wi-Fi capability, which allows you to connect your camera to your smartphone or tablet wirelessly. This feature makes it easy to control your camera remotely and transfer your images and videos directly to your device for editing and sharing.
To use this feature, simply connect your camera to your smartphone or tablet using the app’s built-in Wi-Fi capability. Once connected, you can use your device to control your camera remotely, adjust settings, and capture images and videos from a distance.
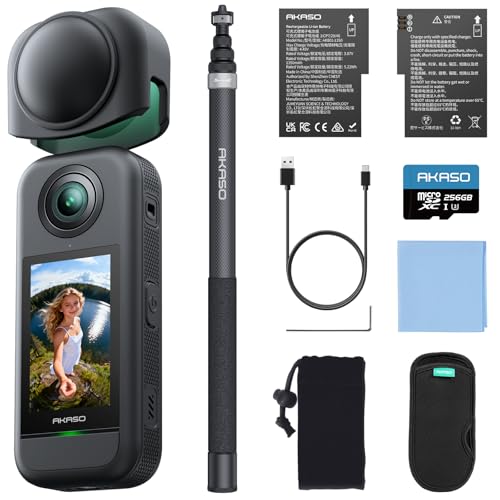
Connecting with Accessories
Another way to extend the capabilities of your 360 camera before after app is by connecting it with accessories such as selfie sticks, tripods, and mounts. These accessories can help you capture images and videos from unique angles and perspectives, giving you even more creative control over your content.
For example, a selfie stick can help you capture stunning 360-degree selfies from above or below, while a tripod can help you stabilize your camera for long exposures or time-lapse videos. And with the right mount, you can attach your camera to your bike, helmet, or even your pet for unique and exciting perspectives.
In conclusion, by utilizing the Wi-Fi capability and connecting with accessories, you can extend the capabilities of your 360 camera before after app and capture stunning images and videos from unique angles and perspectives. So, why not experiment with these features and see what creative possibilities await you?
Cost-Effective Solutions
https://www.youtube.com/watch?v=92qMxQcXhBE&embed=true
If you’re looking for a cost-effective way to create 360-degree before and after photos, there are a few options available to you. In this section, we’ll explore two of the most popular solutions: choosing an inexpensive app and using free stitching software.
Choosing an Inexpensive App
There are many apps available for both iOS and Android that can help you create 360-degree before and after photos. Some of the most popular options include:
- Panorama 360 Camera
- Google Street View
- Cardboard Camera
- 360 Panorama
These apps are all relatively inexpensive and can help you create stunning 360-degree photos with ease. They also offer a range of features, from automatic stitching to manual control over exposure and focus.
Free Stitching Software
If you’re looking for a more hands-on approach, you can also use free stitching software to create your 360-degree before and after photos. Some of the most popular options include:
- Hugin
- Autostitch
- Microsoft Image Composite Editor
These software solutions are all free to download and use, and offer a range of features for creating and editing your 360-degree photos. They can be a bit more complex to use than the apps mentioned above, but they offer greater control over the final output.
Overall, there are many cost-effective solutions available for creating 360-degree before and after photos. Whether you choose to use an app or stitching software, you can create stunning photos that showcase your work in a unique and engaging way.
Taking the Perfect Selfie
https://www.youtube.com/watch?v=LiSh0k3YW3s&embed=true
Taking the perfect selfie can be a challenge, but with a 360-degree camera app, it’s easier than ever. Here are some tips to help you take the perfect selfie with a camera 360 before after app.
Selfie Enhancements
Before taking your selfie, consider using some enhancements to make your photo look better. Most camera 360 before after apps offer a range of filters and effects that you can use to enhance your photo. You can also adjust the brightness, contrast, and saturation to make your photo look more vibrant.
Another way to enhance your selfie is by using the beauty mode. Beauty mode smooths out your skin and removes blemishes, giving you a flawless look. However, be careful not to overdo it, as it can make your photo look unnatural.
Using a Timer Wisely
One of the most important things to consider when taking a selfie is the timing. You don’t want to rush the shot, but you also don’t want to hold the camera for too long. Using a timer can help you get the perfect shot.
Set the timer for a few seconds and then position the camera. Once the timer starts, strike a pose and hold it until the photo is taken. This way, you can get the perfect shot without having to hold the camera for too long.
In conclusion, taking the perfect selfie with a camera 360 before after app is easy if you follow these tips. Use enhancements to make your photo look better, and use a timer to get the perfect shot. With these tips, you can take a great selfie every time.
Frequently Asked Questions
https://www.youtube.com/watch?v=ZL92-XrkI8o&embed=true
How can I take 360-degree photos on my iPhone?
Taking 360-degree photos on your iPhone is easy with the Camera 360 app. Simply download the app from the App Store, open it, and select the “360” option from the camera menu. Then, hold your phone steady and slowly rotate in a circle to capture the full 360-degree view.
Is there a cost associated with the Camera 360 app?
No, the Camera 360 app is completely free to download and use. However, some features may require in-app purchases or a premium subscription.
What are the best free 360 camera apps available for iPhones?
Apart from Camera 360, some of the best free 360 camera apps available for iPhones include Google Street View, Panorama 360, and Cardboard Camera. Each app has its own unique features and capabilities, so it’s worth trying out a few to see which one works best for you.
Can I use Camera 360 on my Android device?
Yes, the Camera 360 app is available for both iOS and Android devices. Simply download the app from the Google Play Store, open it, and start taking 360-degree photos.
How do I use the remote shutter feature in the Camera 360 app?
The remote shutter feature in the Camera 360 app allows you to take photos from a distance using a Bluetooth remote. To use this feature, first pair your remote with your phone via Bluetooth. Then, open the Camera 360 app and select the “360” option from the camera menu. Finally, press the button on your remote to take a photo.
Where can I download the Camera 360 app for my PC?
Unfortunately, the Camera 360 app is not available for PC at this time. However, there are other 360-degree photo editing and viewing apps available for PC, such as Microsoft Photos and Kuula.